Whether you’re a renter or a homeowner, it’s crucial to leave your old home in good condition when moving out – so you can get your security deposit back or so you can sell your property more easily and at a higher price.
Therefore, along with the myriad relocation tasks you will need to take care of, you will also have to make the time and effort to clean your home before moving out – remove dust and cobwebs, wash the windows, clean the walls and floors, etc.
When it comes to cleaning the walls, you may be tempted to skip the task – they rarely appear to be dirty, so why waste precious time dealing with them? In fact, however, dust, dirt, and grime can easily build up on walls without regular cleaning – so, unless you have washed them recently, you’ll definitely need to take care of the vertical surfaces in your home before moving out. And you will undoubtedly want to do it in the fastest and easiest way possible, so you can focus on your more important moving tasks.
So, how to clean walls quickly and efficiently? How to make them look great before leaving your old home – with minimal time and effort?
Read on to find out the best way to clean walls when moving out:
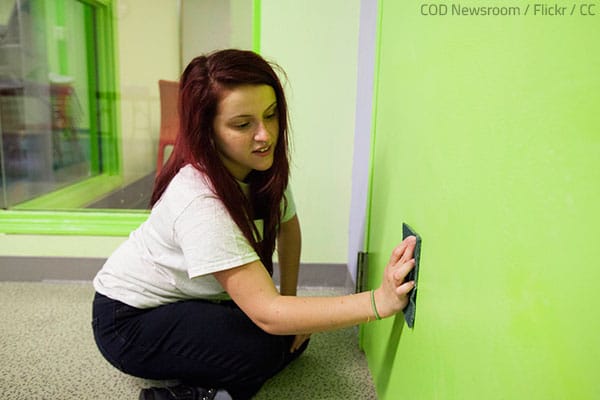
How to clean walls when moving out
Cleaning walls is quite a straightforward process:
Step 1. Prepare the necessary cleaning supplies
When cleaning the walls of your old home before moving out, you’re going to need:
- Two buckets
- A flat-head microfiber mop
- Cleaning cloths and sponges (microfiber cloths work best)
- Towels or absorbent cloths
- Liquid dish soap, distilled white vinegar, baking soda, or a commercial wall cleaner
- Magic Eraser
- A vacuum cleaner with a brush attachment
- A ladder
- Drop cloths, old towels, or tarp
Step 2. Prepare the walls for cleaning
In order to be able to clean the walls, you will need access to them:
- Move furniture and other items away from the walls;
- Take down pictures, photos, mirrors, wall clocks, and other wall décor;
- Remove any nails, hooks, and screws;
- Use a Magic Eraser (or a similar specialized product) to fix any remaining nail holes. (If there are bigger holes in the walls, be sure to fill them with spackling paste.)
See also: How to fill in nail holes when moving out
Step 3. Remove cobwebs and dust
Start the actual wall cleaning process by removing cobwebs and vacuuming away the dust.
You can use a broom with a long handle to remove any cobwebs from the walls (pay special attention to the corners as that is where spider webs are most commonly found) or you can simply vacuum up the webs.
When ready, put the brush attachment on your vacuum and run it over the wall to remove any dust and loose dirt from the surface. Be as thorough as possible – if any dust remains, it will turn mud-like when you start washing the wall and will make the cleaning process much more difficult and much less efficient.
Good to remember:
- If you use a feather duster instead of a vacuum, the dust may settle over the wall again;
- When vacuuming the walls, be sure to use the brush attachment to prevent scratching or damaging the paint or wallpapers.
Step 4. Wash the walls
After removing the cobwebs, dust, and dirt, you can finally get to washing the walls:
- Use tarp, old towels, or drop cloths to protect the floor at the base of the walls from drips of water and/or cleaning fluids;
- Prepare your cleaning solution – In most cases, a mild cleaning solution of liquid dish soap (or white vinegar) and warm water will work perfectly. Depending on the type of the wall and how dirty it is, however, you may need a stronger cleaning solution or a more specialized cleaner (see below for details);
- Use one bucket for the cleaning solution and another for rinsing (fill the second bucket with clean water);
- Wash the wall – Dip a microfiber mop into the soapy water and start washing the wall from the top down. Alternatively, you can use a microfiber cloth or a sponge – dip it in the cleaning solution, wring it out so it’s not dripping wet, and gently scrub the wall in circular motions. Rinse with clean water – use a clean cloth (or sponge, or mop pad) dampened in clear water and be careful not to get the wall too wet;
- Spot clean stains – If any stubborn stains remain on the wall after you’ve washed it with the mild cleaning solution, mix baking soda with water and gently rub the paste onto the stain with a soft cloth. Wait for several minutes, then wipe the area with clean water;
- Dry off the wall – After you’ve finished washing the wall, blot the surface with a towel or an absorbent cloth to soak up as much of the moisture as possible. This will not only prevent potential damage to the paint or wallpaper from prolonged exposure to moisture, but will also prevent dust and dirt from sticking to the wall immediately after it’s washed. Run ceiling fans and open up windows to increase air circulation and help the walls dry up faster.
Do not forget to wipe down the baseboards, as well (use the same mild cleaning solution intended for the walls).
Bonus tips for cleaning walls before moving out:
1) Spot test cleaning solutions – Always test your cleaning solution on a small, inconspicuous area of the wall first. This is especially important for stronger cleaners – and for walls with flat or matte finishes.
2) Avoid harsher cleaners – Stronger cleaners are more likely to affect the paint and damage the finish, cause discoloration, or leave streaks behind. Soapy water and natural cleaners (like baking soda and white vinegar) are the best choice.
3) Use non-abrasive cleaning materials and do not scrub too hard – Abrasive cleaning agents and abrasive cloths, sponges, and pads – as well as hard scrubbing – can remove some of the paint, leaving unsightly marks and streaks behind that can only be fixed by repainting the wall. Needless to say, abrasive cleaning materials will tear wallpaper.
4) Be careful not to wet the walls too much – Some paint walls and finished can get damaged if they’re exposed to too much moisture – and some wallpapers can be stripped by moisture. Besides, if you use too much water and the cleaning solution drips or runs down the wall, it will create streaks as it dries.
5) Wash the walls before focusing on stains – This way, the mild cleaning solution will have a chance to work on the stains and may remove some – or all – of them. If any stains remain, attempt to remove them with baking soda, as described above. In case this doesn’t work either, you can try hydrogen peroxide or a solution of ammonia, vinegar, and water – or you can buy a specialized stain remover. When it comes to greasy spots, a degreaser will likely do the trick.
6) Take care to avoid streaks – Streaks are one of the most common issues when cleaning walls, but they’re not too difficult to avoid. Here is how to clean walls without streaks:
- Thoroughly dust the walls before washing them – if any dust remains and gets damp, it will create streaks on the walls;
- Avoid harsher cleaners and abrasive cleaning materials and do not scrub too hard (as detailed above);
- Do not get the walls too wet and dry them off immediately after washing them.
Now that you know the basics of wall cleaning, it’s time to find out how to best clean different kinds of walls.
What is the best way to clean walls when moving out?
The best way to clean walls – no matter whether before moving out, before moving in, or while living in the home – depends on the type of the wall.
So, your first task is to take a close look at the walls in your home: Are they wallpapered? Are they painted or not? If they’re painted, what kind of paint is used?
How to clean painted walls
When it comes to painted walls, the type of the paint and the finish is very important as some are much more difficult to clean than others:
- Flat paints and eggshell finishes are easily vulnerable to damage and require very gentle cleaning. The best way to clean walls with flat paint is to wipe them with a microfiber cloth, dampened in a solution of white vinegar and water, then wipe them with clean water, and dry them thoroughly. Never use harsh chemicals or commercial degreasers on walls with eggshell or matte finishes;
- Satin finishes (the most common interior paint finish) are more durable but they readily show marks and discolorations, so they, too, need to be cleaned very carefully. You can use soapy water or a solution of white vinegar and water, but your need to rub very gently and thoroughly dry the wall immediately after rinsing it with clean water;
- Semi-gloss and high-gloss paints are shiny and reflective – they’re quite durable and much easier to clean as they can withstand stronger cleaners and more vigorous scrubbing (just be sure to use non-abrasive cleaning products and materials).
Good to remember: You can use a solution of dish soap and water or a solution of white vinegar and water for walls with latex paint, but you should never use vinegar on walls with oil-based paint – the acid in vinegar can dull and damage oil-based finishes. Ammonia-based cleaners should also not be used on oil-based paint, as they too can damage the finish.
Bonus tip: How to clean a painted wall without removing the paint?
The greatest challenge when cleaning painted walls – and especially when removing stains from painted walls – is to prevent damage to the paint and the finish.
Paint can get damaged during cleaning if it gets too wet, if you scrub too hard, or if you use abrasive cleaning materials or harsh cleaning products.
So, in order to clean painted walls without removing the paint you need to:
- avoid harsh cleaners;
- use soft cleaning cloths or microfiber mop pads;
- rub gently;
- make sure the walls are just barely damp, not wet (wring out cleaning cloths, use a dry cloth to absorb excess moisture while cleaning, dry off walls immediately after washing them; etc.)
How to clean wallpaper walls
Nowadays, most wallpapers are washable (vinyl wallpaper, fiberglass wallpaper, etc.), so you can clean them the same way you clean a painted wall – dip a microfiber cloth in a solution of liquid dish soap and warm water, wring it out until it’s just damp, and gently wipe down the wallpapered wall.
Traditional cellulose wallpaper cannot be washed – all you can do is carefully vacuum the wall to remove cobwebs, dust, and loose dirt. Be sure to use the soft brush attachment on your vacuum, so that it doesn’t damage or tear up the wallpaper.
When it comes to removing stains from wallpaper, you can use an art gum eraser to gently rub away scuffs, dirt, and fingerprints. Crayon marks and grease spots can be removed by placing several sheets of white paper towels over the stains and pressing with an iron on the lowest setting. Cornstarch and talcum powder can also work – let the starch/powder sit on the stain for several hours, then brush it away with a soft, dry cloth.
How to clean tile walls
The best way to clean bathroom walls, tiled kitchen walls, and other tiled walls is to spray the tiled surface with a cleaning solution, wait for a while, and rinse.
Depending on the type of the tiles and how dirty they’re, you can use a solution of liquid dish and water, lemon juice (or white vinegar) and water, or even bleach and water (one part bleach to four parts water). You can safely use vinegar to clean ceramic or porcelain tiles, but it is too acidic for terracotta, marble, or granite tiles (you need a pH-neutral cleaner – like soapy water – for such tiles). Bleach is safe for non-porous tiles, though it should not be used for routine cleaning.
If there is mold on the tiles or grout, mix 1/2 cup baking soda with several teaspoons of water, apply the paste to the moldy areas, let it sit for 10 minutes, and scrub away with a bristle brush (you can use an old toothbrush for the grout). Spay with a vinegar solution (or bleach solution), wait for 5 minutes, and rinse with clean water.
See also: How to clean a bathroom before moving in
Now you know how to clean walls before moving out. If it seems like too much work – or if you simply don’t have the time or the energy to deal with it while preparing for your move – consider hiring professional cleaning services. The pros will do all the work for you and you will be free to take care of other important relocation tasks. It will cost you, of course, but your old home will be clean and fresh and you will be able to focus on your move. (See also: Should I hire cleaning services before moving out)
Bonus tip: Wondering how to clean walls before moving in? Use the same tips and techniques as described above!
